Monitoring and Troubleshooting
This section guides you through monitoring and troubleshooting your node's snapshotting process.
1. Confirming and Monitoring Node Snapshotting Process
1.1 Monitoring Node Activity
Snapshotter Dashboard
Our Snapshotter Dashboard enables you to verify if your node slot is actively submitting snapshots.

Telegram Reporting Bot
Snapshotter Lite Nodes have the capability to send Telegram messages directly to you if any issues arise during the snapshotting process. See the Telegram Bot Setup page for instructions on how to enable this feature.
Slot Monitoring Service
The Powerloom Slot Monitoring Service provides comprehensive real-time monitoring for your node's slot activities. This service offers webhook-based notifications through platforms like Slack and Discord, giving you instant alerts about your slot's performance and submission status. See the Slot Monitoring Setup page for detailed configuration instructions.
1.2 Simulation Logs
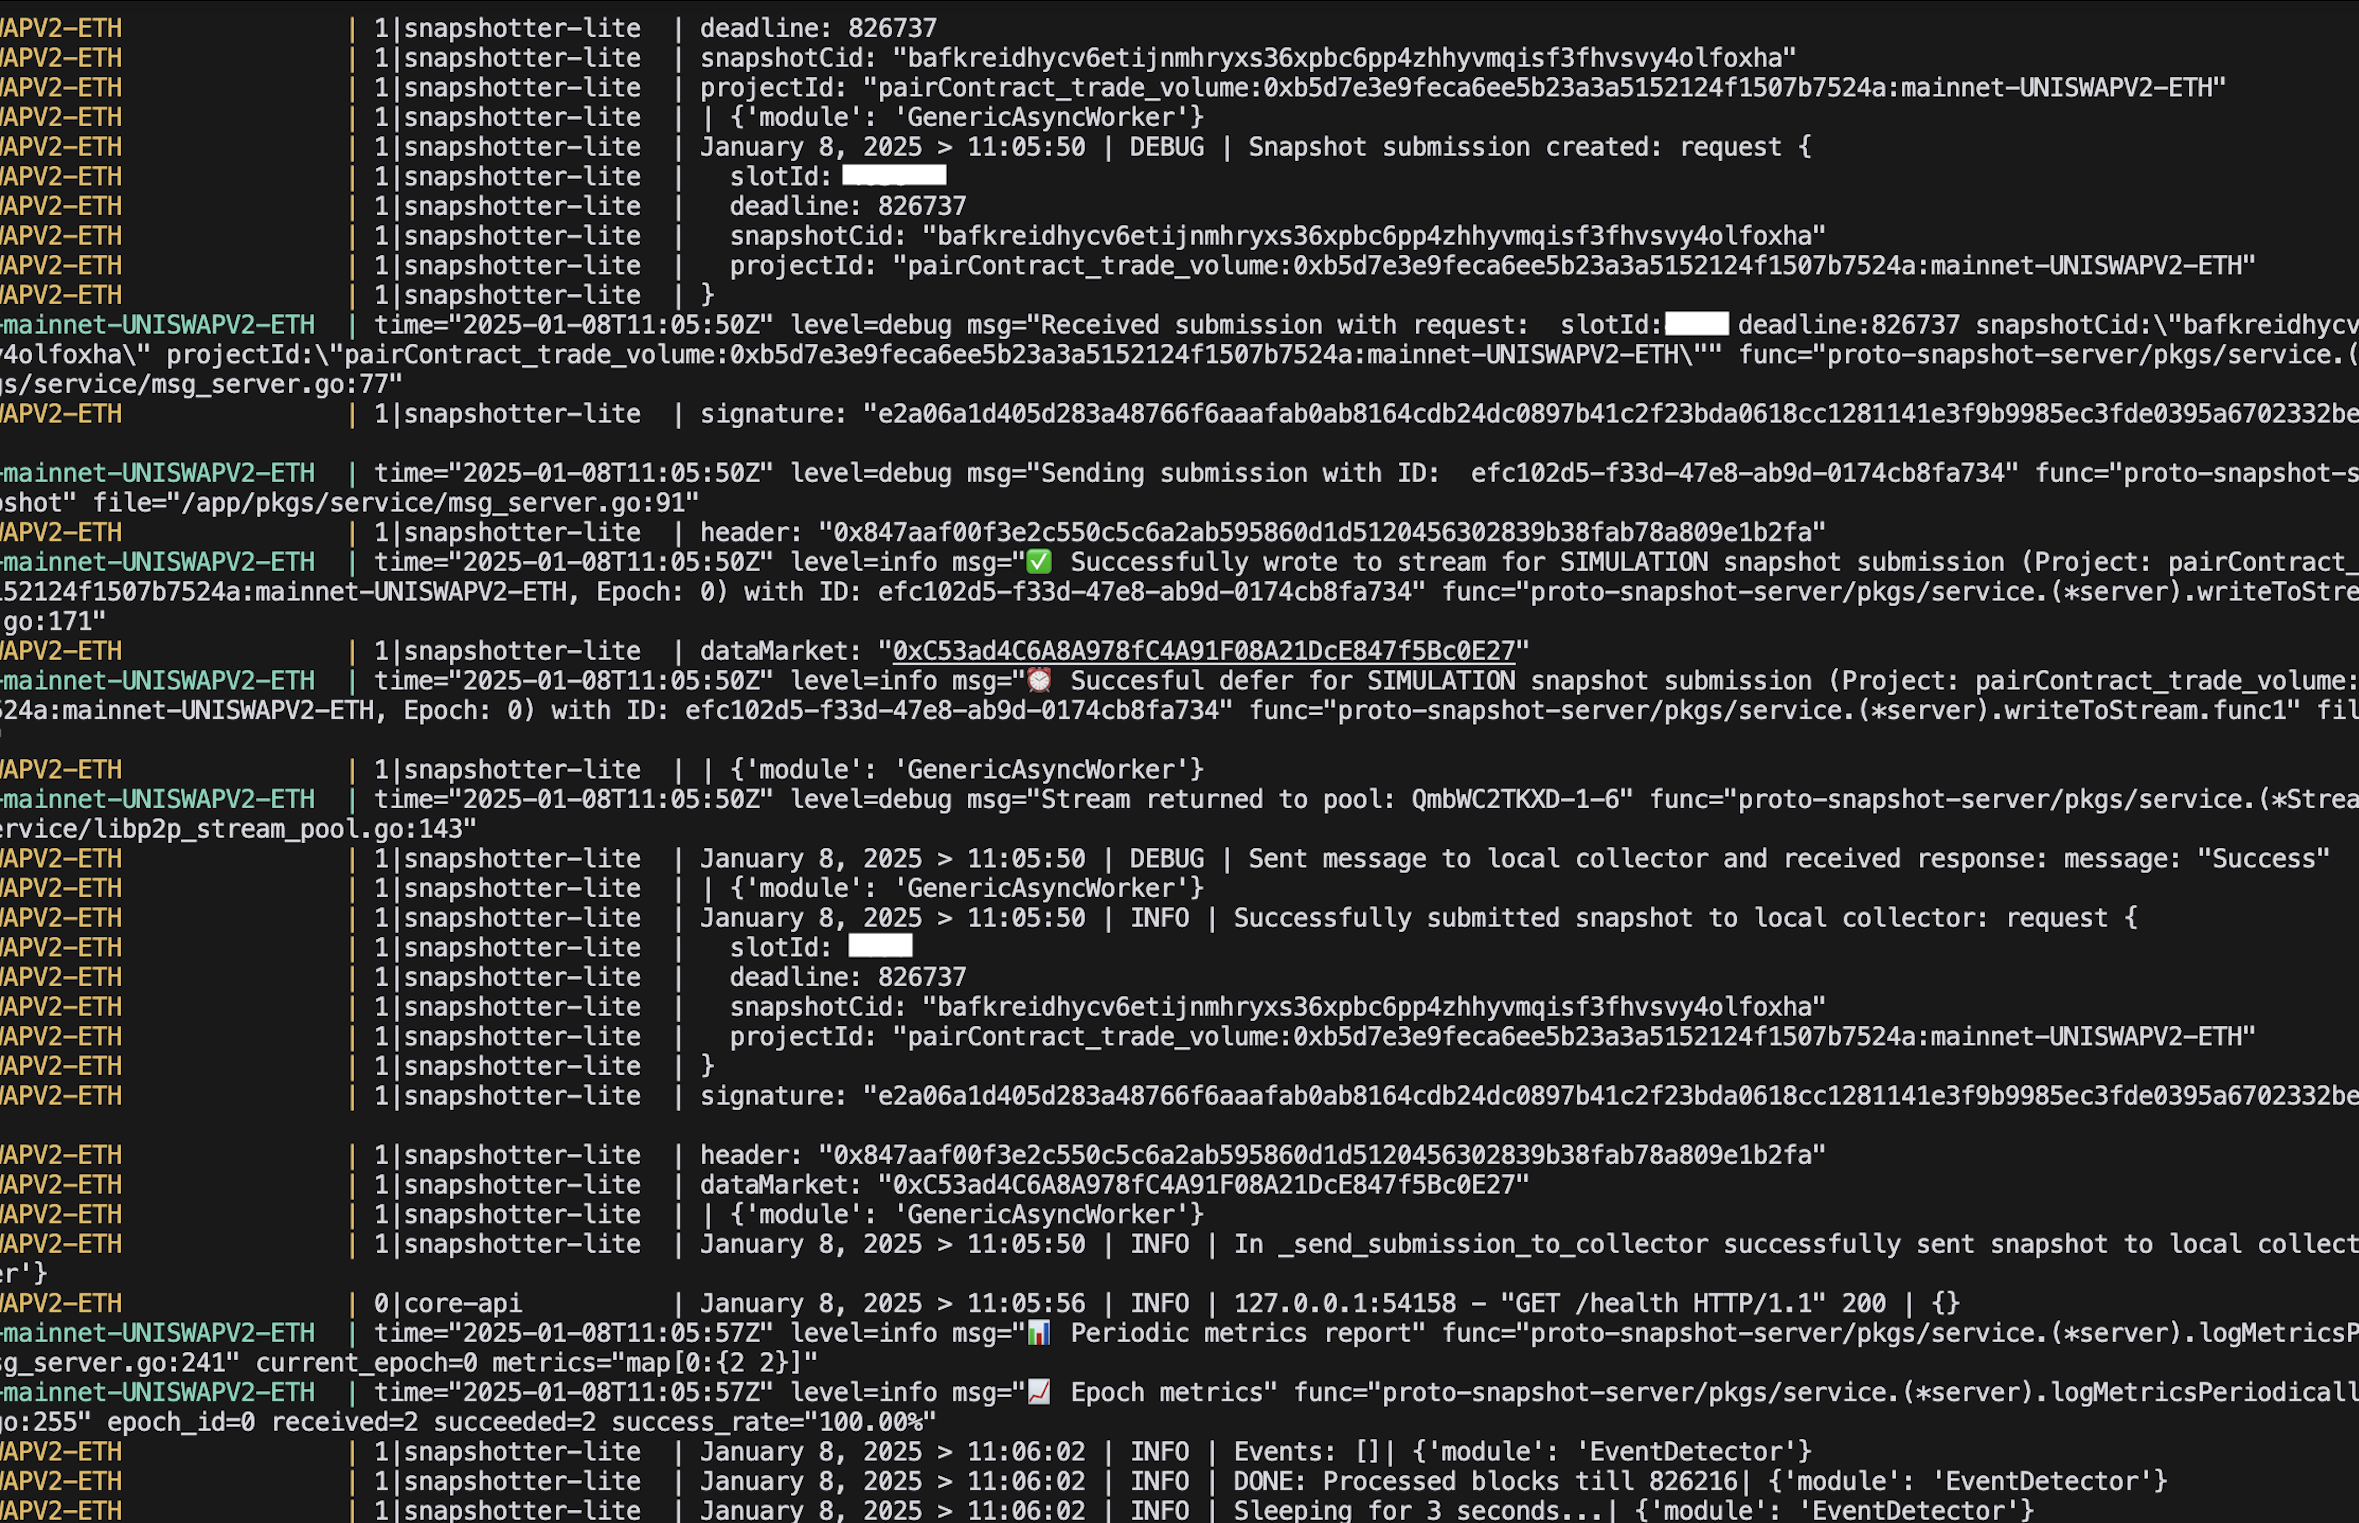
On start-up, the node will perform two simulation submissions to test its connection to the sequencer network. If you notice logs similar to the lines below in the terminal, then your node's simulation submissions were successful.

1.3 Terminal Status Check
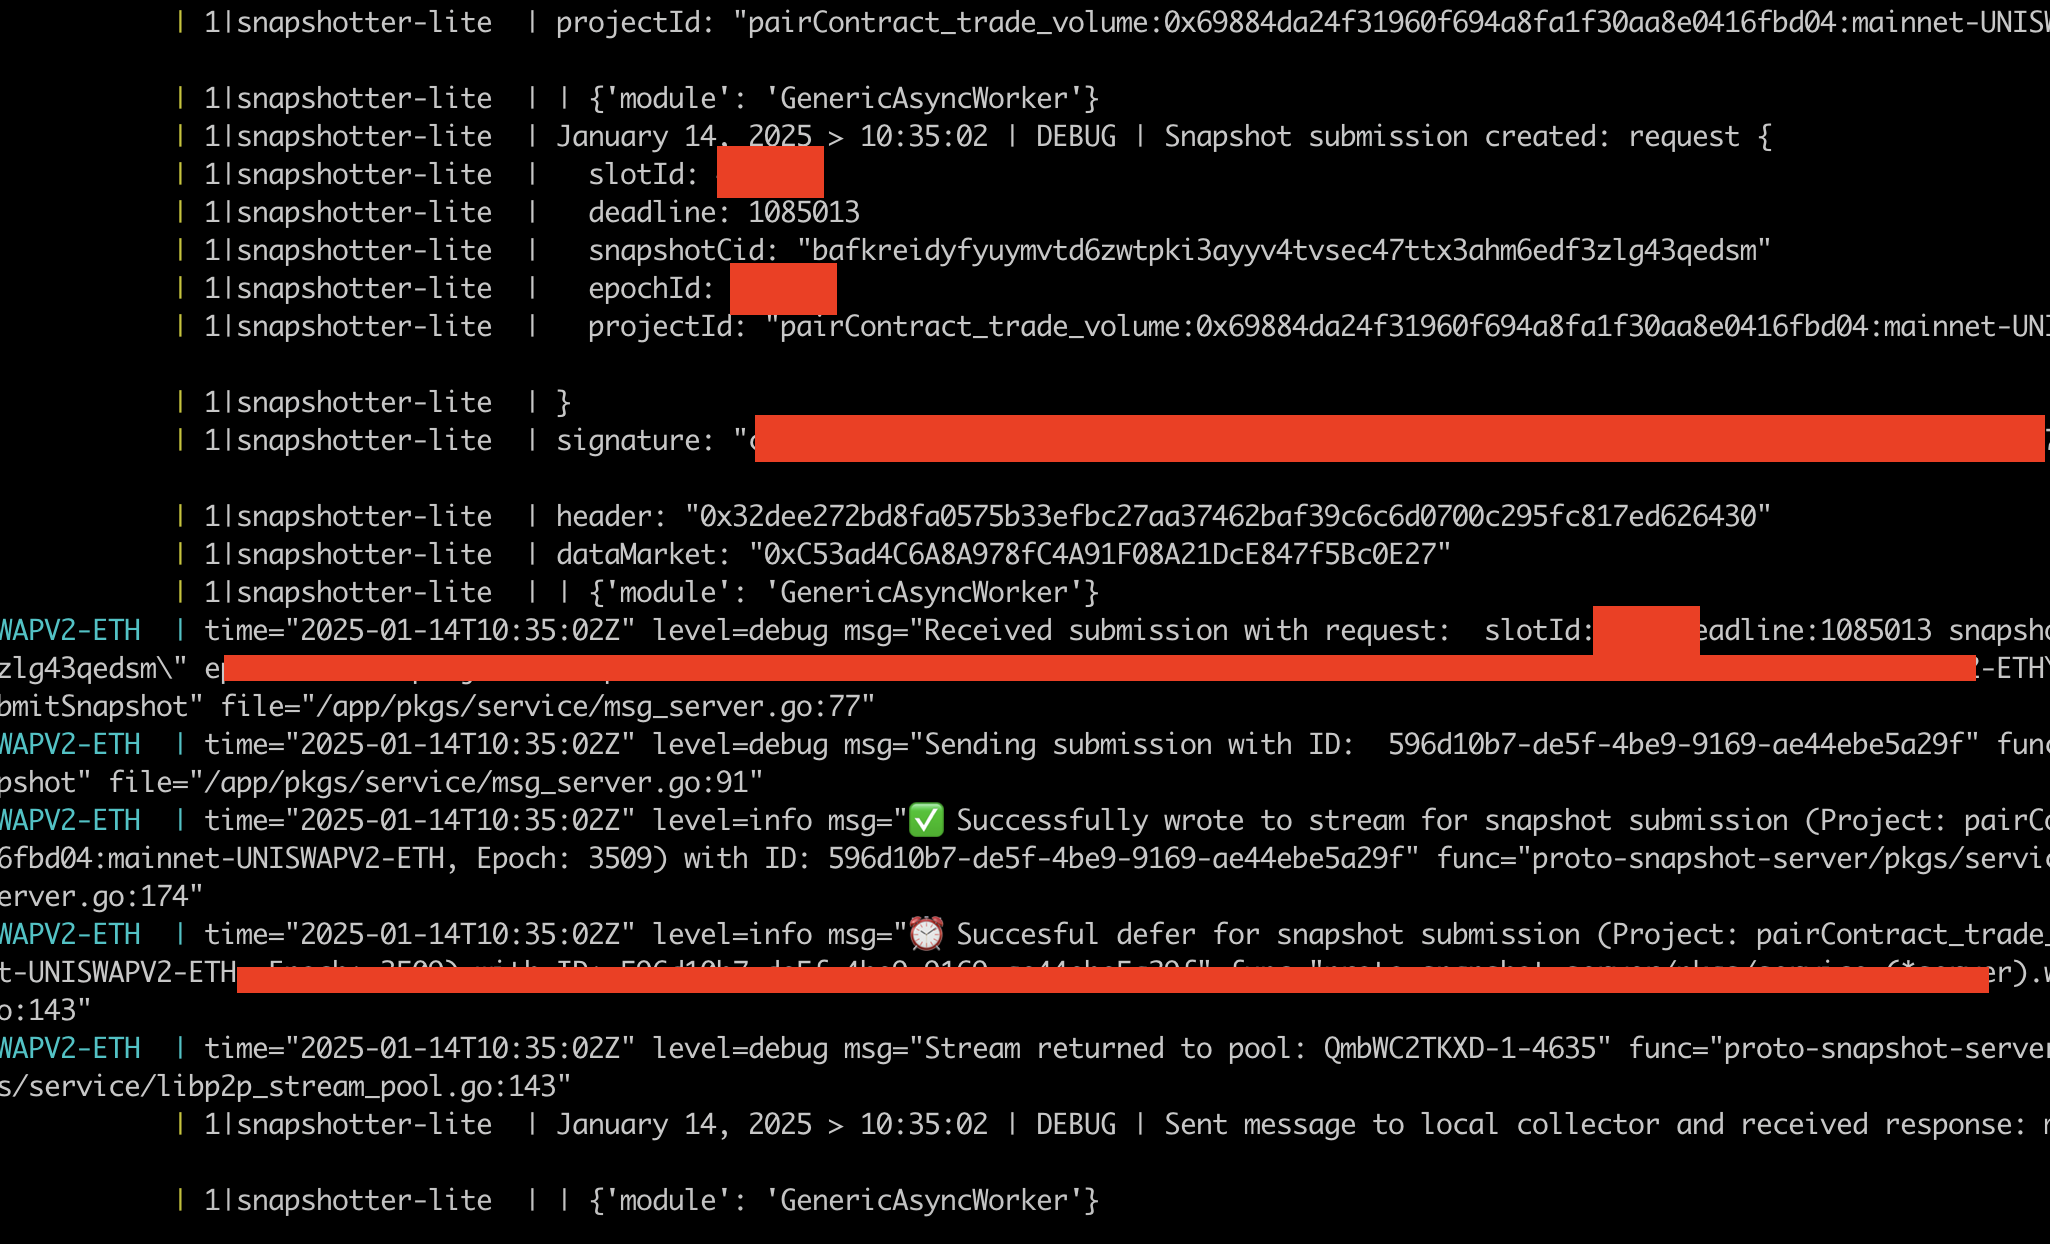
The primary method to verify node status is through the terminal, which displays log responses from the node. Monitor these logs to assess the health and activity of your node. A healthy snapshotter will produce logs similar to the provided example screenshot. These logs indicate normal operation and successful snapshotting.

2. Troubleshooting and Support
This section provides guidance for troubleshooting your node. These steps help identify and resolve common problems efficiently.
2.1 Diagnostic and Cleanup Script
The diagnostic and cleanup script checks for previous instances of the lite node, local collector, stale images, and networks.
./diagnose.sh
For detailed usage instructions, refer to Diagnostics
2.2 Check Status of Running Docker Containers
If you launched your node using the ./build.sh script, check your running Docker containers with:
docker ps
You should typically see output similar to:

Containers follow these naming patterns:
snapshotter-lite-v2-<slot-id>-<network>-<data-market>-<data-source-chain>snapshotter-collector-v2-<slot-id>-<network>-<data-market>-<data-source-chain>
If these containers aren't visible, refer to the Diagnostics section to check for previous instances.
For example, if participating with:
- Slot ID 1234
- On Powerloom Mainnet
- In the UniswapV2 data market on Ethereum mainnet
You should see these containers:
snapshotter-lite-v2-1234-mainnet-UNISWAPV2-ETH-- this corresponds to the snapshotter lite node that computes and generates the snapshotsnapshotter-collector-v2-1234-mainnet-UNISWAPV2-ETH-- this corresponds to the local collector that collects the snapshot and submits it to the sequencer
Both containers should show a healthy status.
In a multi-node setup, you'll see multiple lite node containers sharing a single collector. This is expected behavior.
2.2.1 Check Container Logs
Check running container logs with:
docker logs <container-name> -n 500
This displays the last 500 lines of the container's logs.
Following the previous example, check the snapshotter-lite-v2-1234-mainnet-UNISWAPV2-ETH container logs with:
docker logs snapshotter-lite-v2-1234-mainnet-UNISWAPV2-ETH -n 500
2.3 Check Screen Session Status
If you followed the Getting Started instructions, you'll have a screen session named powerloom-mainnet running.
Verify the screen session is running with:
screen -ls

If the powerloom-mainnet session is running, attach to it with:
screen -r powerloom-mainnet
If working correctly, you should see at least one submission log within 3-5 minutes.

screen -R powerloom-mainnet will also attach you to the powerloom-mainnet session, or create a new one if it doesn't exist.
This is the first step in the getting started section.
2.4 Stop, Kill, and Cleanup Specific Slots' Runtimes
2.4.1 Stop and Remove Docker Containers
Stop either the snapshotter lite node or local collector container for specific slots using these commands. Replace 1234 with your slot ID.
docker ps --format '{{.Names}}' | grep '1234-mainnet-UNISWAPV2-ETH' | xargs docker kill
docker ps --format '{{.Names}}' | grep '1234-mainnet-UNISWAPV2-ETH' | xargs docker rm
To kill all containers on Powerloom Mainnet for a specific data market (e.g., UniswapV2 on Ethereum mainnet), use:
docker ps --format '{{.Names}}' | grep 'mainnet-UNISWAPV2-ETH' | xargs docker kill
docker ps --format '{{.Names}}' | grep 'mainnet-UNISWAPV2-ETH' | xargs docker rm
2.4.2 Remove Screen Sessions
For a single node setup, kill the screen session with:
screen -X -S powerloom-mainnet quit
For a multi-node setup, kill all screens for a specific slot ID with:
screen -ls | grep 'powerloom-mainnet-v2-1234-UNISWAPV2' | cut -d. -f1 | awk '{print $1}' | xargs -I % screen -X -S % quit
2.4 Editing the Environment File
The environment file for participating in a data market is located in the powerloom-mainnet directory. It contains:
- The namespace
mainnet - Data market name (e.g.,
UNISWAPV2orAAVEV3) - Data source chain (e.g.,
ETHfor Ethereum mainnet data)
The examples below use .env-mainnet-UNISWAPV2-ETH. This filename appears during ./build.sh execution if you've completed configuration.
Environment files follow the format .env-mainnet-<data-market-name>-<data-source-chain> for mainnet nodes.
For Aave V3 on Ethereum mainnet, the file would be .env-mainnet-AAVEV3-ETH.

The .env file contains essential configuration: SOURCE_RPC_URL, SIGNER_WALLET_ADDRESS, SIGNER_PRIVATE_KEY, and SLOT_ID. To modify these variables:
-
Navigate to the Node Directory:
cd powerloom-mainnet -
Edit the Environment File:
nano .env-mainnet-UNISWAPV2-ETH
Update variables as needed. Press CTRL+X to save and exit.
- Rebuild the Node:
./build.sh
2.5 Using build.sh to Reconfigure the Node
The build.sh script reconfigures the node with a single command. It reruns the setup process, updates the environment file, and rebuilds the node.
./build.sh
When prompted to update the existing environment file, select y to proceed.

2.6 Data Source RPC URLs
You may encounter errors related to the RPC URL configured for your data source (e.g., UniswapV2 or AaveV3 on Ethereum mainnet). When this occurs, verify your RPC URL is correct. For instructions on changing the RPC URL, refer to Editing the Environment File.
While we cannot recommend specific RPC providers and leave the choice to the community, these reliable options are available:
- Ankr:
https://rpc.ankr.com/eth- Public RPC service, no signup required - Infura: Requires signup and API key, provides usage monitoring
- Alchemy: Requires signup and API key, includes usage tracking
Additional Support
If you have followed these troubleshooting steps and still encounter issues, please contact us on discord for further assistance. Our goal is to ensure your node runs smoothly, and we're here to help with any challenges you might face.